Follow my blog with Bloglovin
Well, today is a pretty exciting freaking day. Today is the first time in EIGHT WHOLE YEARS that I have uploaded to my YouTube Channel. That’s right, I’ve resurrected my YouTube, ladies and gentlemen. This is not a drill. This is real life. And I am kicking off the new channel with little tutorial on a hairstyle that I wear ALL the time… the classic beachy wave!
I just love how effortless and easy this style is. I think my favorite thing about it, is once you’ve styled it once, it just looks better as the week goes on! Minimal touch-ups, minimal worries, maximum fab!
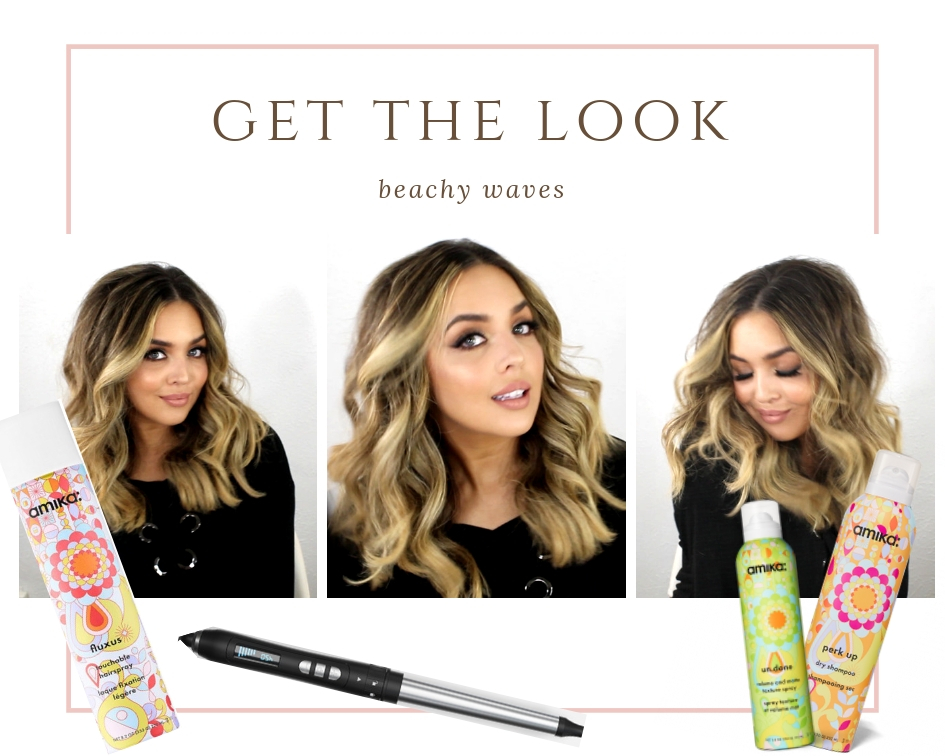
Begin with blown-out hair. and add dry shampoo to the roots for some matte texture. (Tip: I find that this style looks best on day 2 or 3 day-old hair)
Use a curling wand to grab large sections of your hair and curl away from your face leaving 1-2 inches out at the ends. (Tip: rock the wand back and forth to smooth out the curl even more)
On the top layer, make sure to grab diagonal sections to help the waves layer on top of each other for maximum, beachy movement.
After the waves have set and the hair is cool, use a flexible-hold hairspray to lock in the shape.
Finish it off by shaking out the waves to separate and spray throughout with a texture spray for added body and texture.
When it comes to hairstyles, it doesn’t get much easier. In the video tutorial I go into a bit more detail depending on your hair texture and how to best recreate the look for YOU.
Now, I know I’m a little rusty on this whole video tutorial shindig but I had SO much fun creating this tutorial for you guys and literally could not wait to share it! If you want more of these, let me know what other tutorials you’d like to see in the comments below!